Check Your Gear! My checklist for excursions
Gear is what makes photography both more fun and more difficult. Lenses and tripods, flash apparatus and hoods can give us a level of creativity beyond just exposing a sensor to light and hoping for something to happen. I only use my iPhone’s camera for quick shots, just to document something, capture a moment to share with others, or in a desperate situation when my “real” cameras aren’t available. Whatever your experience level or objective, you still need to use the right gear and prepare it before your expedition.

Our family went on a service trip in August and September, and on a deep-sea fishing trip in early November. One was a journey into unknown conditions, the other an 8-hour event in salt water. I didn’t want to deal with lenses and filters on either trip, so I chose to take my Canon Powershot instead of the Eos Rebel. For serious creativity I would rather use the Eos, but I’m still learning about how to use it. I wanted to know that I could capture the shots that told the story. The Powershot wouldn’t require keeping up with nearly as much gear. Even so, I learned something significant and useful about checking my gear before an event.
What Gear Should I Check? (All of it)
1. Battery or batteries :
Whatever you use as a power supply for your camera and any other gear. I learned pretty early into the trip that I need to change back to electronics AA’s for my Powershot. I had been using household rechargeable batteries, because I’ve been trying to make myself use the Eos more and depend less on the Powershot. But even fresh out of the charger, they just don’t have enough juice to keep the camera powered for long. I put two freshly-charged batteries into the camera before leaving the house, and shortly into the trip I was getting the low battery indicator. During the 4-hour fishing segment of the trip, the camera would no longer power on and displayed “Change The Batteries.” I put the other freshly-charged set in and got the same message. Evidently, I don’t fully understand how you’re supposed to use rechargeable batteries. I can eliminate the problem by going back to the batteries that are made for high-use electronics. They cost more but they’re worth it.
My Eos has a separate power pack, but I only have one. I always charge it up before every expedition, and I plan to get another one soon. If all your other gear works perfectly but you run out of power for the camera itself, your experience will not be a happy one.
2. Your case or bag:
Although you may not want to keep up with another bag, it’s always easier than trying to keep up with individual pieces of gear. Pockets are okay, but if your shirt or jacket gets wet, your gear can get wet. If your pocket gets snagged–which is not unheard of around 30 fish hooks– you could lose an important piece of gear. My Powershot’s case is tiny compared to the case I use for my Eos. All the Powershot needs is a pocket for the cable, a pouch for extra batteries, and a slot for an extra card. The Powershot itself is considerably smaller than the Eos. Also, I was going on the trip to fish, not to photograph the event. If the situation were different, if I was the trip’s photographer, I would have wanted the Eos and its case. I would have needed at least one lens and all the stuff I use to care for it.
I also need to consider getting a bigger or better case for my Eos. It’s a pretty tight fit in the bag for the gear I have. I end up having to hunt for stuff. I’d like something with more defined compartments so I don’t have a lens in the same compartment as the flash gear, and I’d like to have the lens care pieces separate from the SD cards. The other thing I have a real problem with is the outboard pouches. They zip all the way around, instead of meeting at the top with two zippers. That’s not good, because gear can fall out of the side of the pocket while you have it open.
3. A good tripod:
This trip didn’t need one, but for more creative shots, my tripod is an essential piece of gear. I have purchased a couple to use with the Powershot and I got one in the kit with my Eos. Still, if I get more skilled with my camera, I’m going to want a better tripod. It needs to be easier to set up and understand how the pieces fit together and work. I didn’t take a tripod on the fishing trip, because I didn’t imagine how i would find a use for it. That was a good choice; the only time the boat was still enough for a tripod to actually be useful was while it was at the dock.
4. Extra cards:
You’ll get a feel for how much you can put on a card until you get up to about 8 GB or bigger. On a couple of vacation trips, I’ve had to do emergency deletions of some bad shots so i could make room on the card. I was transferring images to the computer every day, too! It’s only recently that I started carrying extra cards, and they are the least expensive piece of gear you’ll buy. Since prices on SD cards have dropped, you can have several in your gear bag, and you’ll feel more confident about taking lots of pictures you won’t feel bad about not using.
Takeaway:
Planning your trip, having an understanding of what the conditions will be and what you are likely to see, will give you a good idea of what gear you will need, but you still need to make sure it’s in good condition. What did I miss–is there gear that you would consider essential? What is your pre-trip gear check ritual?


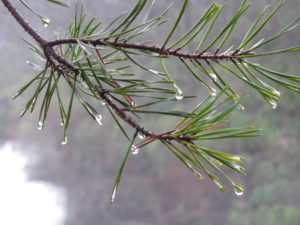
 ISO 3200, aperture f/4.0, shutter speed 1/60